Create a planter with PPC cement
Once you know how easy it is to make cement planters, chances are you’ll never buy them again. Using different containers, you can make a variety of shapes and sizes for inside and outside. Just remember concrete is extremely heavy, so don’t make them so big that you won’t be able to easily move them when you need to.
You will need:
• A large bucket for the mould
• A smaller bucket for the mould
• PPC cement
• Bucket to mix
• Petroleum jelly
• Duct tape
• Ruler
• Pencil
• Grinder
• Masonry blade
• Safety glasses
• Dala acrylic paint, in the colours of your choice
• Paint brush
• Dala Polyurethane Hard Varnish
Steps:
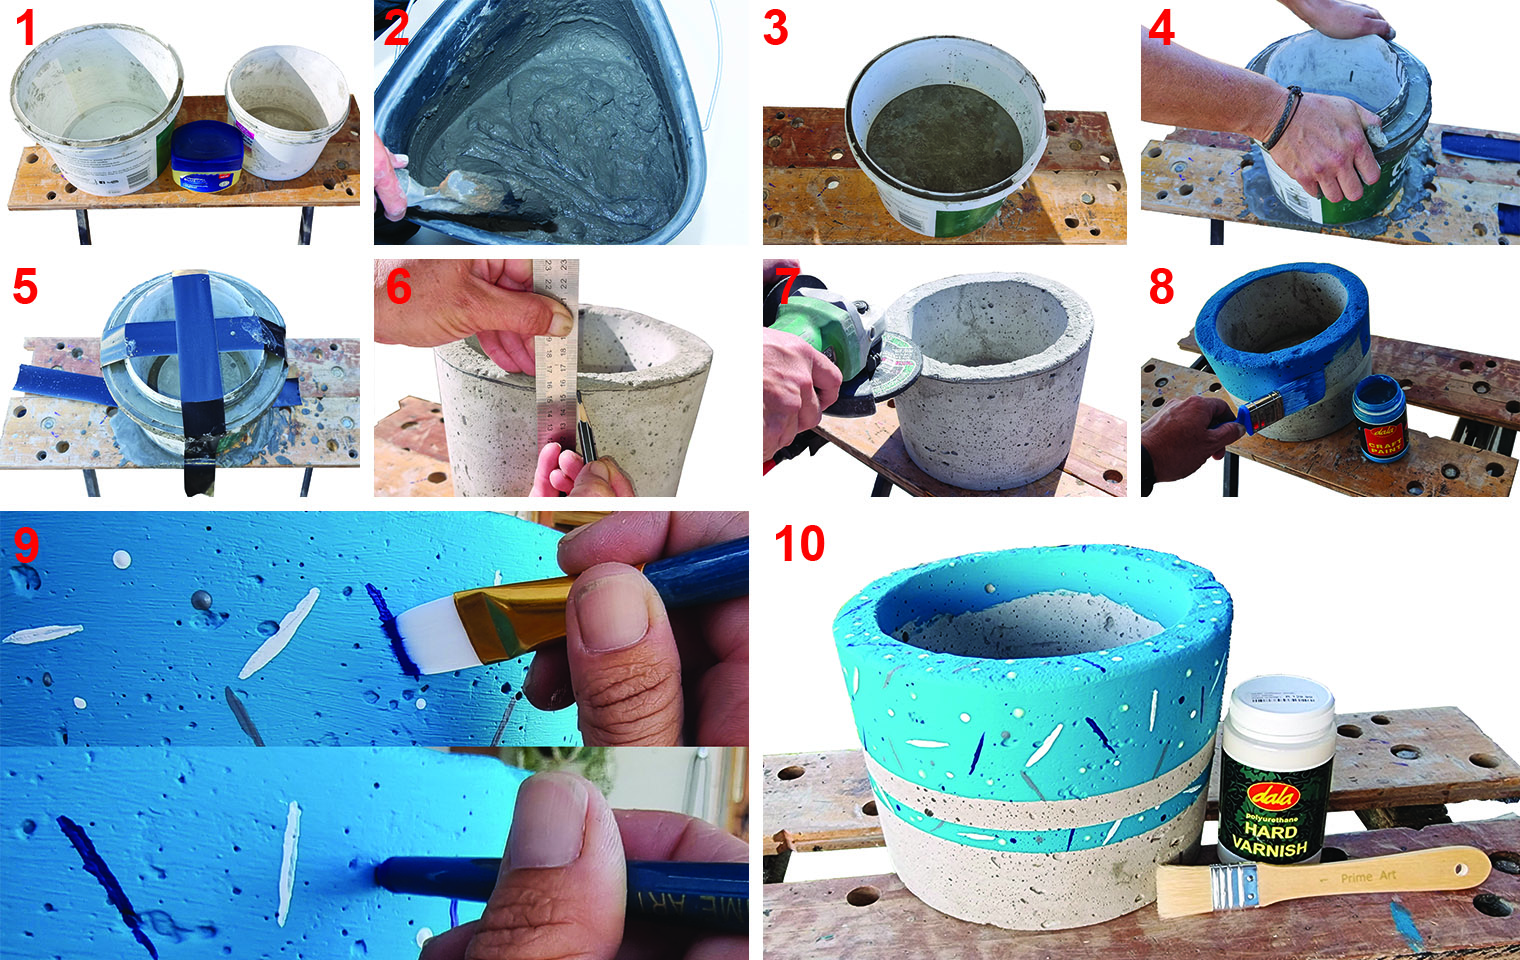
1. Add a thin layer of petroleum jelly on the inside of your large bucket/mould and on the outside of the smaller mould or bucket.
2. Mix your cement according to package instructions, to a smooth peanut butter consistency.
3. Full your larger mould to about ¾ to the top.
4. Now add your smaller mould, push down and make sure you have enough cement in the mould.
5. Using duct tape, tape your 2nd mould down and in place. You want it to stay in place and not float up. Let it dry for at least 24 hours.
6. Once dry, remove from the mould and mark out a guideline for the desired height of the planter.
7. Using a masonry blade and following your guideline, you can get rid of the excess and sand to a smooth, level finish.
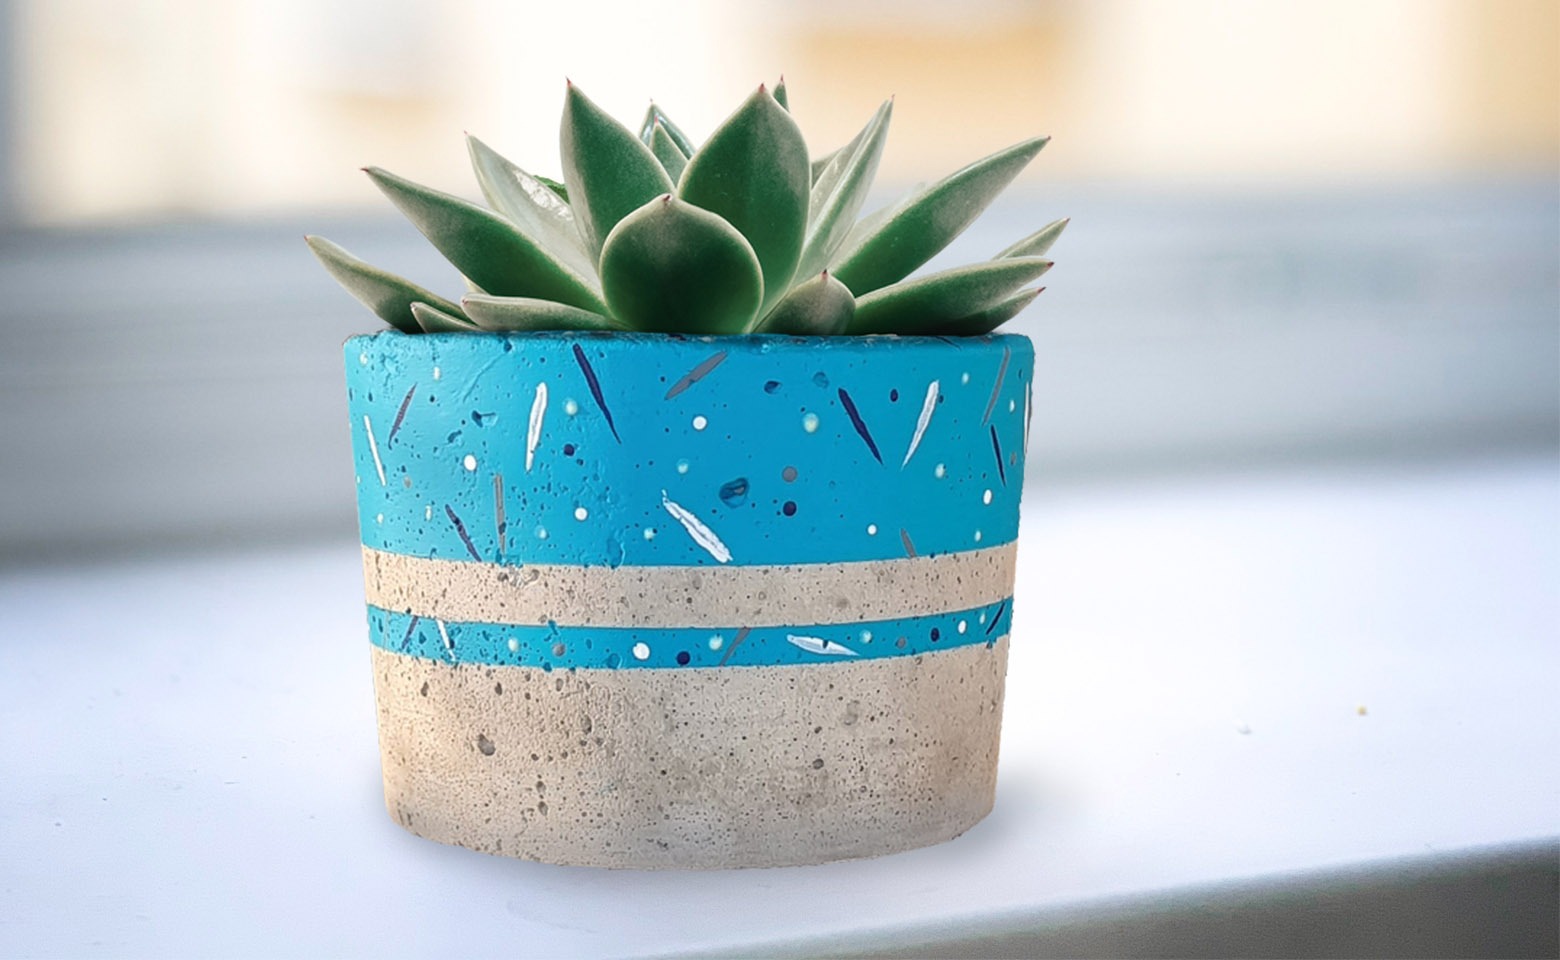
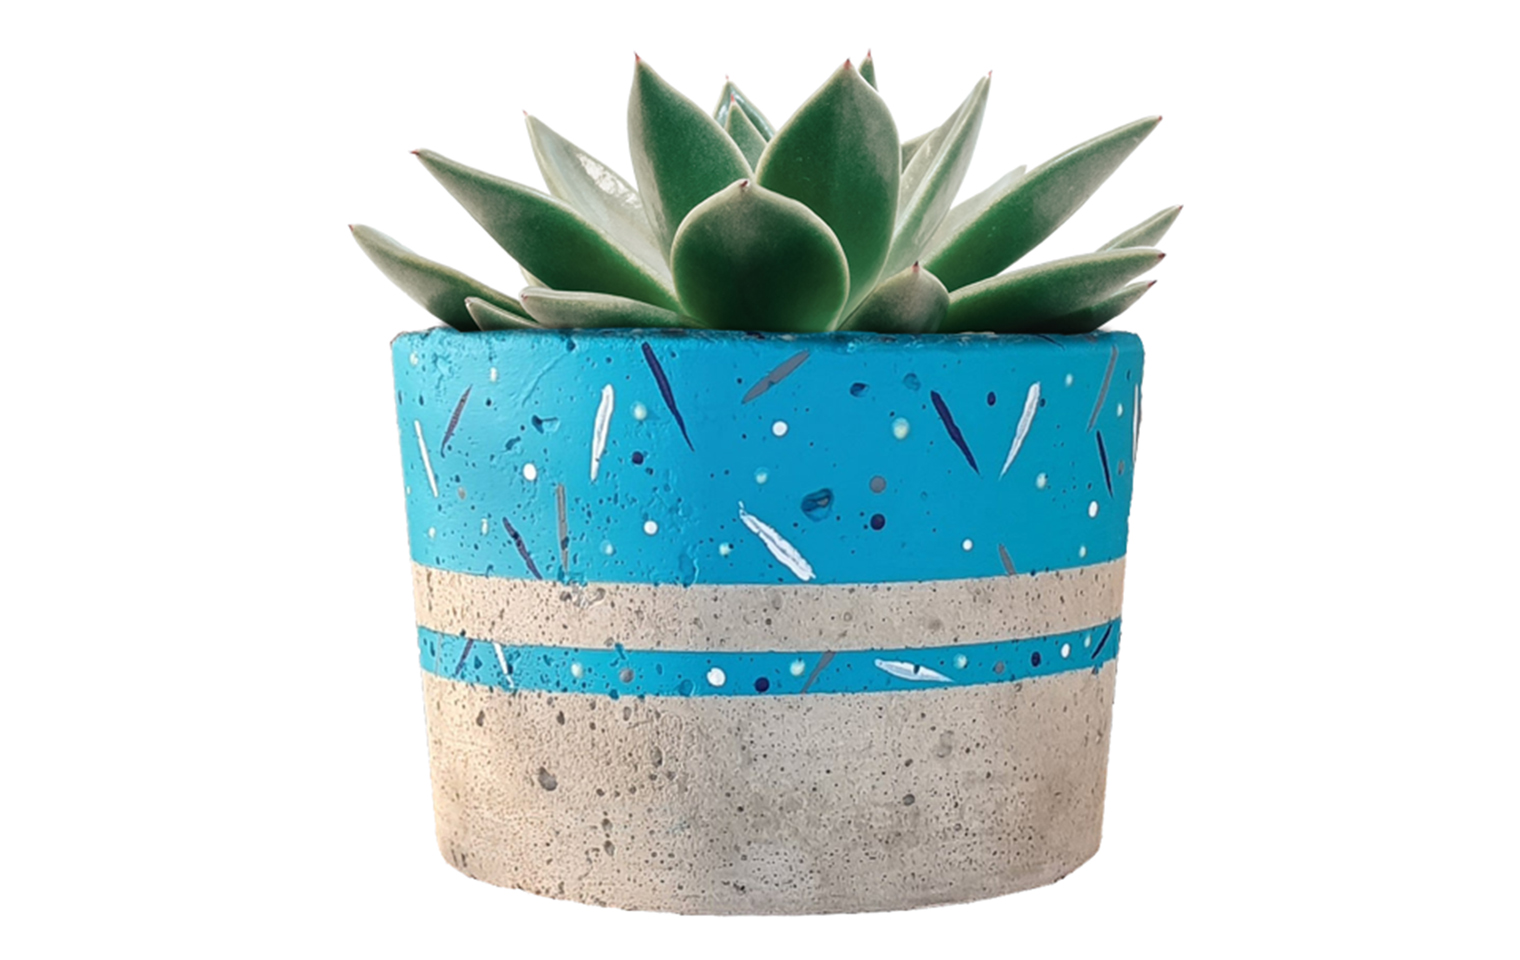
8. To decorate, start with your base colour and paint with at least two coats of Dala acrylic paint, allowing the paint to dry between coats.
9. Using more colour and a smaller paint brush, you can decorate it even more.
10. For extra protection, we finished it off with Dala Hard Varnish Seal.
